Creating your first VM
Prerequisites
1. Obtain the macOS installer
At this time, Anka VM Templates only support the following macOS versions:11.00.x(macOS Big Sur)10.15.x(macOS Catalina)10.14.x(macOS Mojave)10.13.x(macOS High Sierra)10.12.x(macOS Sierra)
- If you have a pending upgrade to the next minor or patch version of Mac OS:
- Within
Preferences -> Software Update -> Advanced, make sureDownload new updates when availableis checked butInstall macOS updatesis not. While you're still withinSoftware Update, clickUpdate Nowbut do not install the next version (Restart) until after you've created the Anka VM or the Install .app under /Applications will be deleted. - You can also use the App Store to download the installer.
- Within
- On Catalina, you can use
softwareupdate:sudo softwareupdate --fetch-full-installer --full-installer-version 10.15.6 - Have your local IT department provide a network volume or download links.
- Use our Getting Started script, but run it with
./create-vm-template.bash --no-anka-create - Have your local IT department provide a network volume or download links.
As an alternative to the macOS installer, you can also use an iso
2. Create your VM
The Anka VM is pre-configured with a default administrative username
ankaand passwordadmin. You can override this with ENVs:ANKA_DEFAULT_USERandANKA_DEFAULT_PASSWD
Anka Develop license (default): While you can create as many VMs as you wish, the free Anka Develop license only allows you to run one VM at a time and will only function on laptops (Macbook, Macbook Pro, and Macbook Air).
Anka Build license: When determining how many cores or memory your VM needs, you can divide the number of VMs you plan on running simultaneously within a single machine by the total virtual cores it has. So, if I have 12vCPUs on my 6core Mac Mini, and I want to allow 2 VMs at once, I will set the VM Template/Tag to have 6cores (12 / 2). However, with RAM, you'll need to allow ~2GB of memory for the Anka Software and host ((totalRAM / 2)-1).
Using the Anka UI
- Click on Create new VM
- Choose the installer (will automatically search /Applications), or drop it into the window
- Click on Options and set any non-default values you want
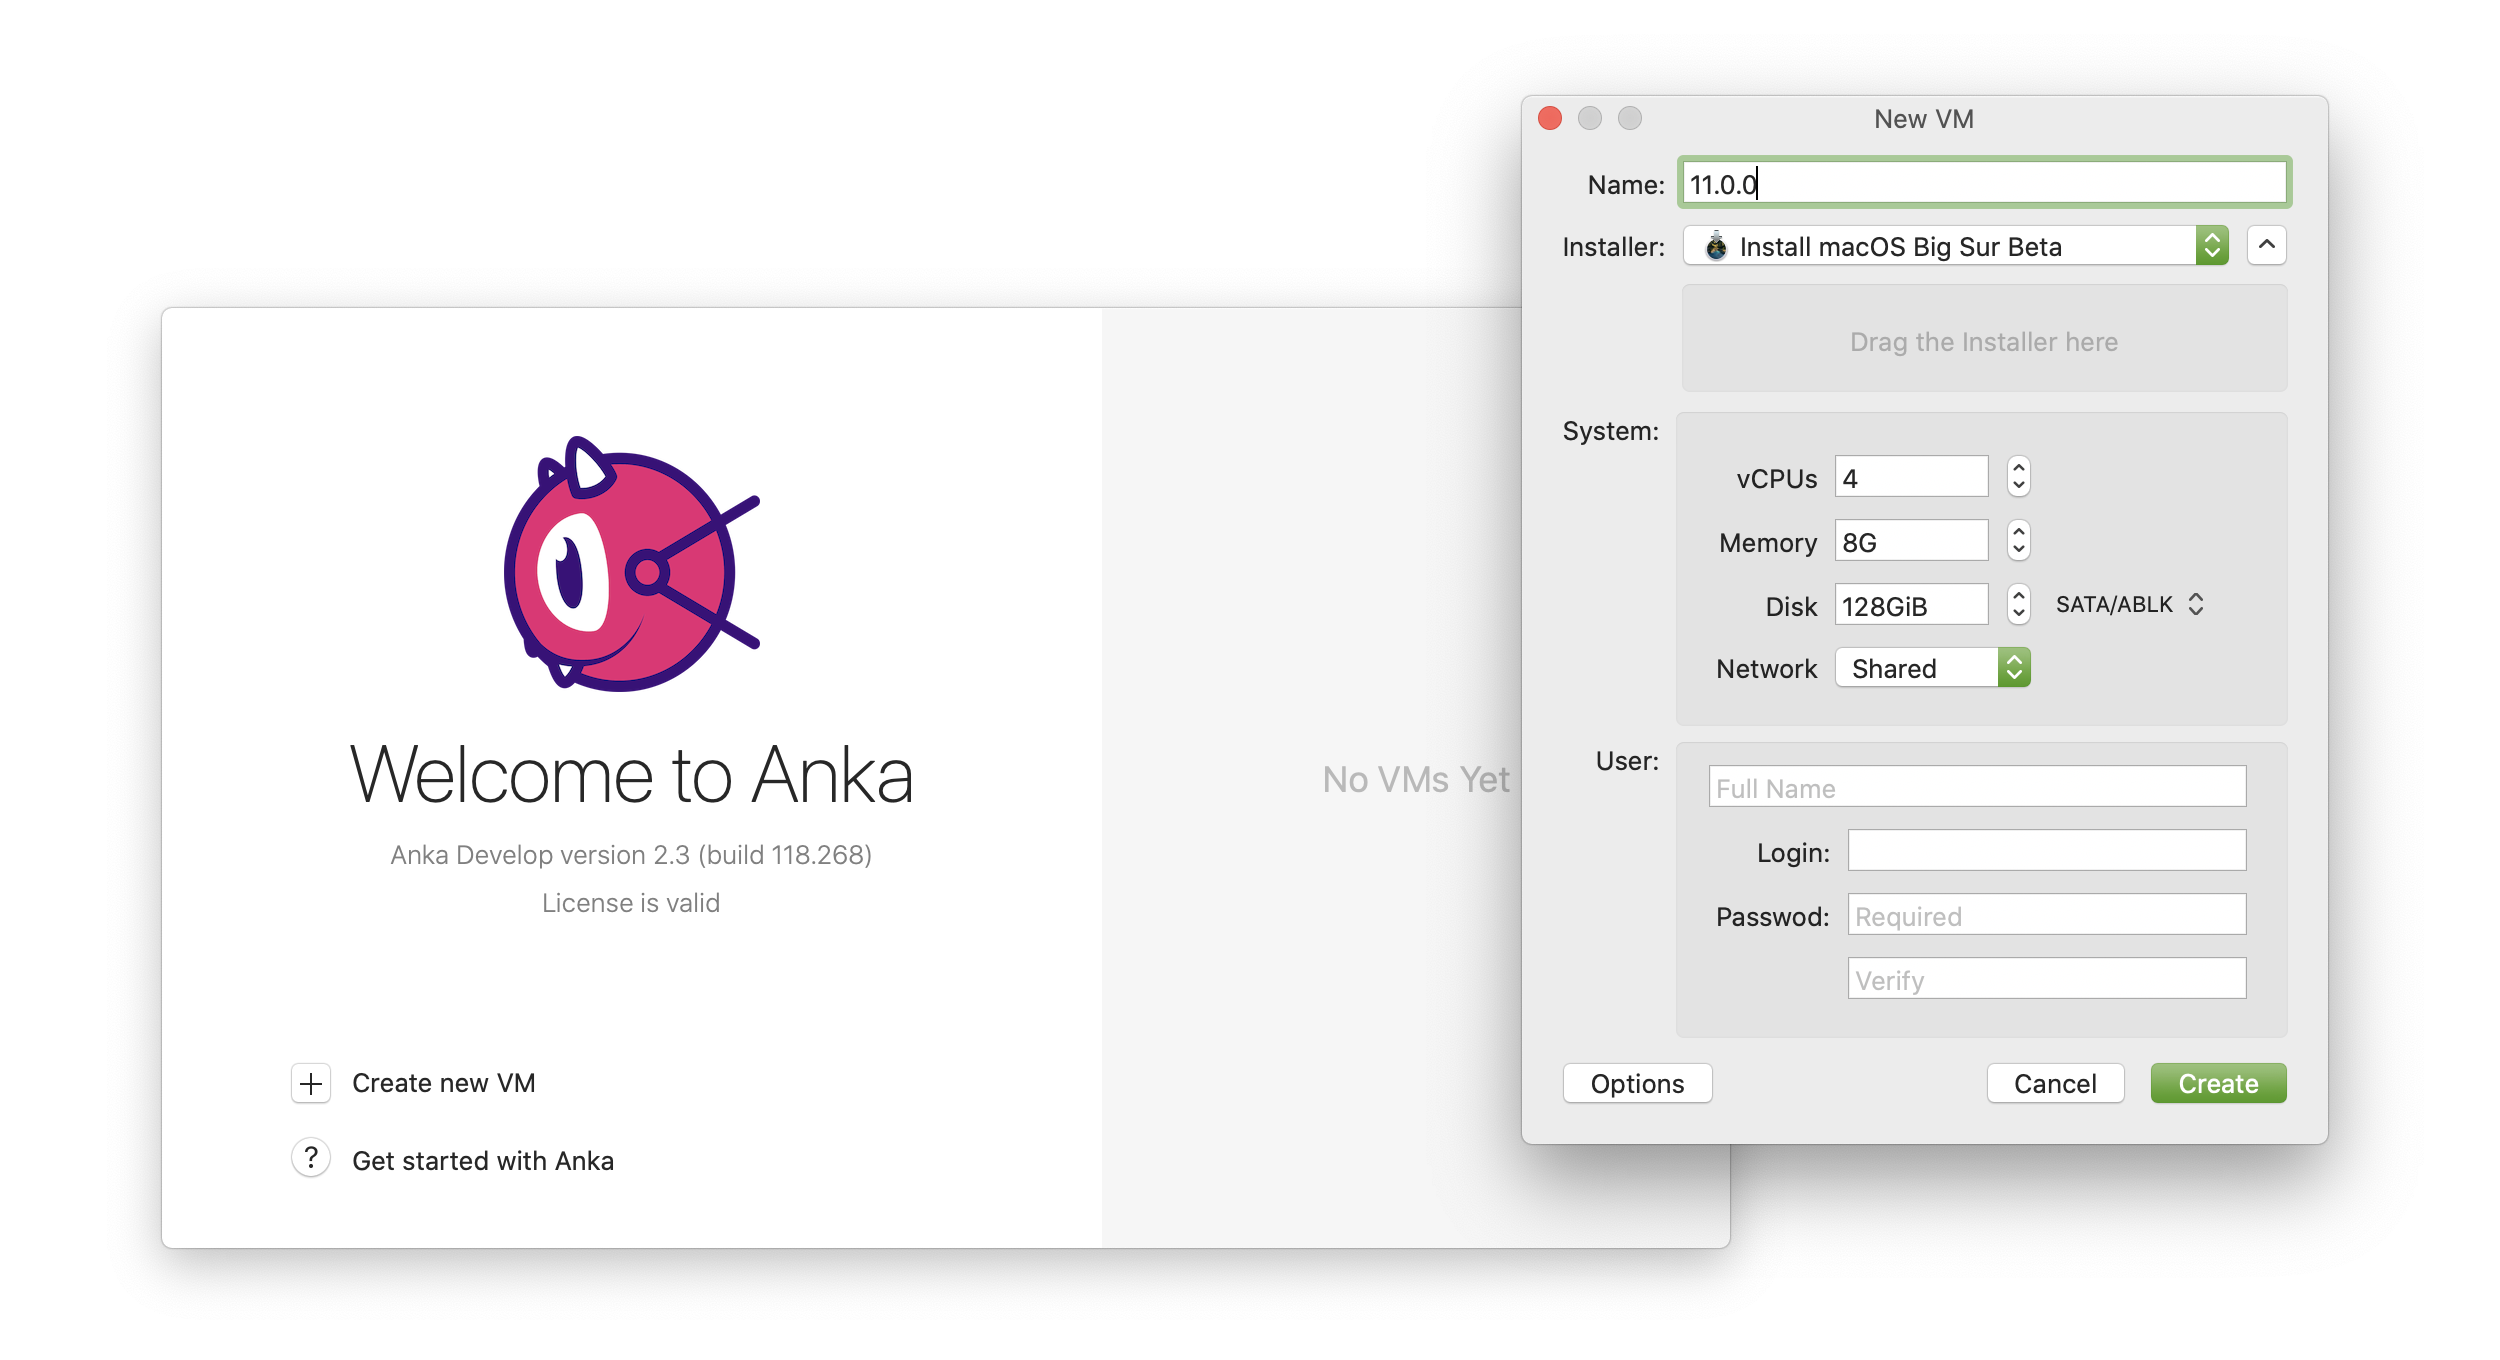
- Please be patient while it's creating. This process can take up to half an hour.
Once the VM template is created, you will see it on the sidebar.

Using the Anka CLI
> sudo anka create --help
Usage: anka create [OPTIONS] VMNAME

  Creates a VM

Options:
  -m, --ram-size TEXT      Set the RAM size (including 'G' or 'M' on the end)
  -c, --cpu-count INTEGER  Set the number of CPU cores
  -d, --disk-size TEXT     Set the disk size when creating a new disk (including 'G' or 'M' on the end)
  -a, --app PATH           Path to the macOS installer .app
  -p, --pkg PATH           Include additional packages to be installed
  -s, --postinstall PATH   Include the script to run with root credentials on initial boot
  -P, --profile PATH       Include a configuration profile(s) to install alongside the macOS installation
  --interactive            Perform default interactive installation instead of the automated one
  --help                   Display usage information
sudo anka create --ram-size 8G --cpu-count 4 --disk-size 80G \
--app /Applications/Install\ macOS\ Catalina.app 10.15.6
Listing available VMs in the CLI
❯ anka list
+------------------------------------------------+--------------------------------------+--------------+------------------------+
| name                                           | uuid                                 | created      | status                 |
+================================================+======================================+==============+========================+
| 10.15.5 (base:port-forward-22:brew-git:gitlab) | c0847bc9-5d2d-4dbc-ba6a-240f7ff08032 | Jul 13 16:40 | suspended Sep 01 20:18 |
+------------------------------------------------+--------------------------------------+--------------+------------------------+
| 10.15.6                                        | 5bba6eea-202e-45ed-9567-d7f55090d049 | Sep 02 10:17 | stopped Sep 02 13:37   |
+------------------------------------------------+--------------------------------------+--------------+------------------------+
| 11.0.1                                         | 2bb1b152-9996-41d6-804a-a429973c13bc | Sep 01 18:45 | stopped Sep 02 14:28   |
+------------------------------------------------+--------------------------------------+--------------+------------------------+
| test                                           | 77f33f4a-75c3-47aa-b3f6-b99e7cdac001 | Sep 03 11:30 | running                |
+------------------------------------------------+--------------------------------------+--------------+------------------------+
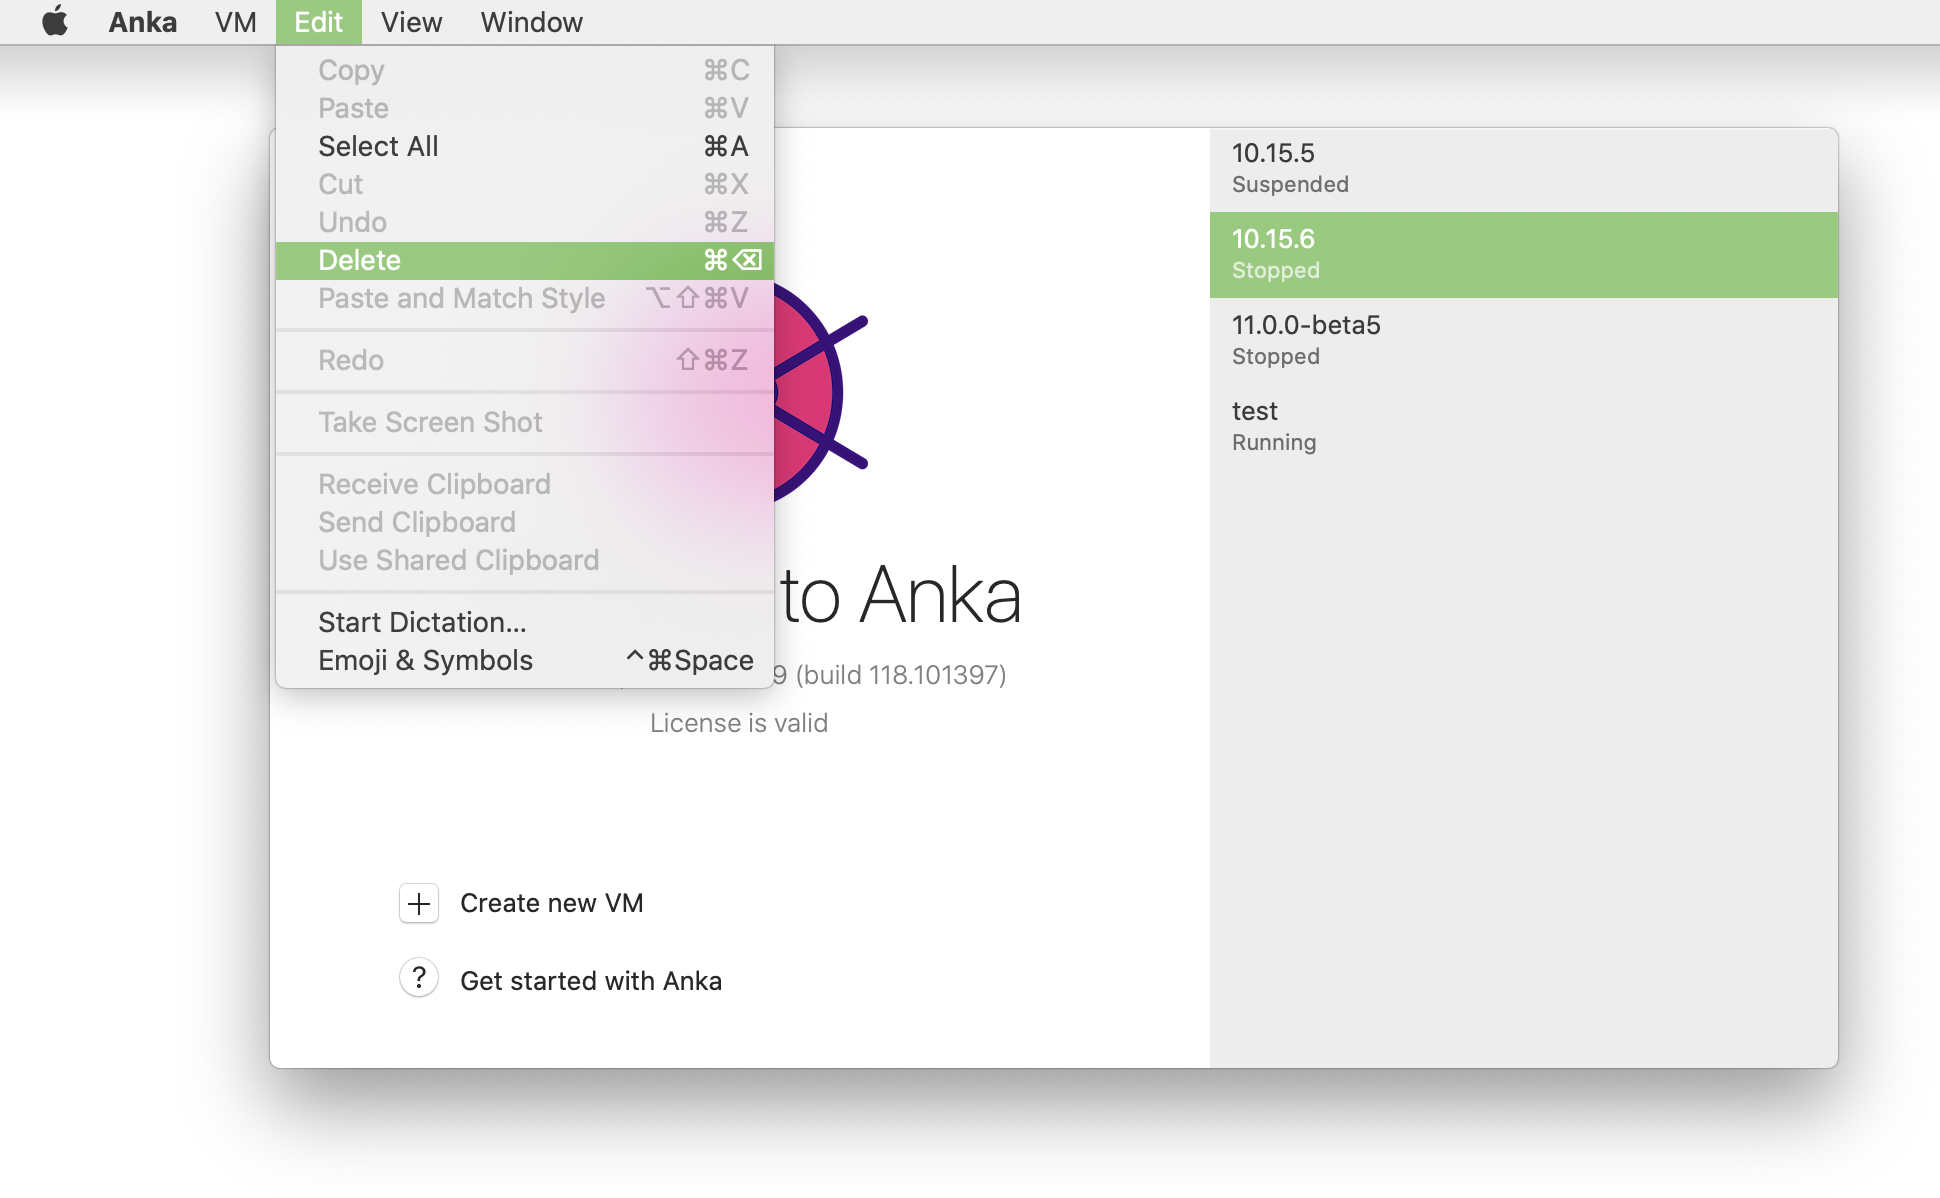
Deleting a VM
Using the Anka UI
Using the Anka CLI
❯ anka delete test
are you sure you want to delete vm 77f33f4a-75c3-47aa-b3f6-b99e7cdac001 test [y/N]:
(Anka Build license + Cloud) Understanding VM Templates, Tags, and Disk Usage
This section mentions features (suspending, tagging, and registry push/pull) which are not available with a free Anka Develop license.
When using Anka Build to create a VM, it's best to think of Anka VMs as VM Templates. Anka VM Templates contain the base macOS installation with a few modifications for optimal performance. You can create Templates using the anka create command or the Anka UI just like you do with any other Anka license.
After a Template is created, you can use anka view and/or anka run commands to install and configure the system or whatever dependencies and software you need inside of the VM.
You can then anka suspend to save the state of the VM. Suspending the VM allows for a fast boot time when running anka start. Suspending the VM uses a fairly significant amount of disk (roughly the amount of memory you've given the VM Template.
It's very important that when you suspend from a started state that the VM has fully booted and logged into a user. If you don't, the VM will fail to start.
You can then push the Template to your Anka Build Cloud Registry using anka registry push and set the Tag. Or, use anka registry push -l {vmNameOrUUID} -t {tag} to only create the Tag locally (useful if you don't have a registry yet and want to quickly switch between tags/dependencies).
Our use of Tags is similar to docker. Tags contain only the delta from the base Template or previous Tag, saving a lot of disk space and bandwidth. They can be built in a sequence from the base Template, each new Tag receiving the contents of the last Tag.
Tags store state of the VM Template. So, if you've got Template1 and a Tag name of Tag1, then clone Template1 to Template2, Template2 will contain everything Template1/Tag1 had inside of it. Post-clone, it will not have any Tags associated with it though.
If you're interested in Infrastructure as Code to automate the creation of your Templates and Tags, you have several options:
- Write scripts that:
- Sequentially parse and execute commands from a data serialization language like JSON or YAML inside of the VM.
- Or execute commands inside of the VM from within the script itself (example).
- Use the Packer Builder: https://github.com/veertuinc/packer-builder-veertu-anka
Lastly, existing VM Templates can be cloned to create a new Template. You have two options:
- Use
anka clonewithout--copy(recommended): The new cloned Template will have no Tags, but will link to the layers/contents from the previous Template and Tag's state. No new disk space will be used until you modify that new Template. The Tag you create on the new Template will only contain the delta. - Use
anka clonewith--copy: The new cloned Template will have no Tags, but will link to the layers/contents from the previous Template and Tag's state. An independent copy of the Template and Tag will be made, in many cases doubling the disk usage.
When creating a clone without
--copy, deletion of the first Template will not delete the contents of the second cloned Template. Anka CLI will intelligently know that the layers are still in use by the new Template.
Re-pushing an existing registry tag
Only available for versions >= 2.3.1
On pushing to the registry, a tag is created. It will also be assigned a specific commit ID (not visible to users). Even if you modify the tag locally, such as adding port-forwarding, changes will not be pushed to the registry until you push with a different tag name.
Now, you can simply untag the VM locally and then push it with the same name (after deleting the VM template or reverting the tag):
Locally, this does not remove the current STATE of the tag from the VM. Your installed dependencies inside of the VM will remain as long as you don't pull or switch to a different tag.
anka registry pull -t tag2 VM
anka delete VM:tag2
anka modify VM add port-forwarding...
curl ... (delete or revert from registry)
anka registry push -t tag2 VM
Feedback
Was this page helpful?
Glad to hear it! Please tell us how we can improve.
Sorry to hear that. Please tell us how we can improve.